


It’s possible that you are already aware of this, but the Minecraft Java Edition is the most advanced version of the game. You may personalize it, enhance it, and change it with the best Minecraft mods according to your preferences, and you can do all of this whether you are playing offline or online.
On the other hand, this opens it up to a wide variety of different types of faults. The JNI errors are one of the most widespread and disastrous types of programming mistakes. This Java problem, which is preventing players from being able to play Minecraft, can be quickly and easily resolved by applying a few straightforward modifications.
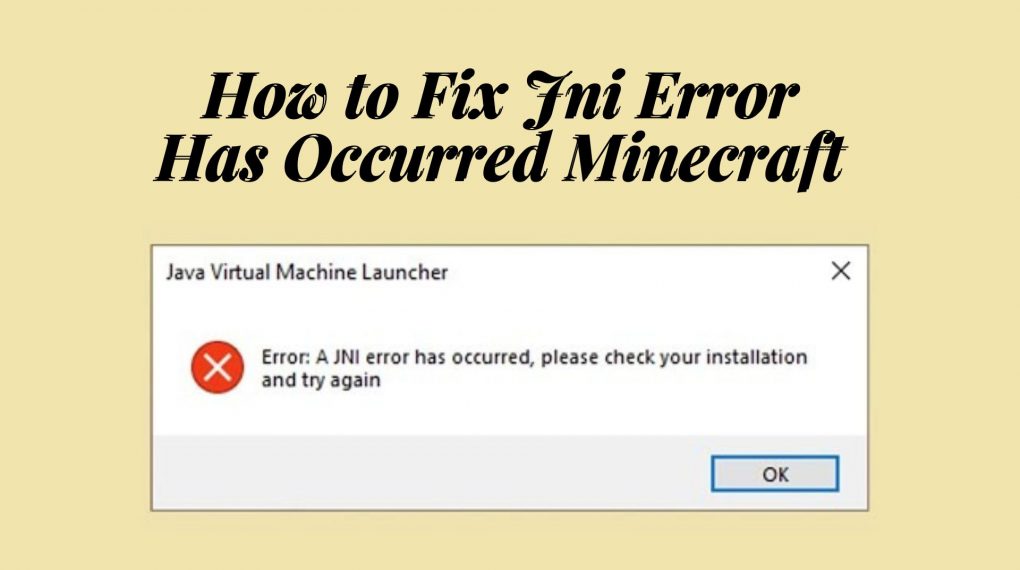
The message “A JNI problem has occurred” appears when you play Minecraft, therefore let’s investigate how to solve it.
Jni error has occurred in Minecraft
First, we went over the reasons behind why the JNI issue appears whether you are configuring a Minecraft server or launching the Minecraft launcher on your own computer. On the other hand, you can utilize the table below to jump ahead to the answer and get your game back in working order.
What Causes the JNI Error in Minecraft
The functionality of Minecraft Java and all of its features are directly tied to the Java libraries that are installed on your computer. If you are using a Minecraft server, mods, or a feature that the library on your machine does not allow, the game may end up encountering an error.
This could be the case if you are using any of these things. These kinds of problems are categorized as JNI, which stands for Java Native Interface errors. In most cases, these problems take place because either the Java files on your device are too recent or the Java version on your device is too old.
These issues can also arise when the installation path of the Java files is corrupted, which can happen at times. To put it another way, all you need to do is check that the Java file on your computer and the Java libraries that come with your operating system are both up to date and compatible with the version of Minecraft mod or server that you have installed. If you follow those steps, the issue will be resolved right away.
How to Fix JNI Error in Minecraft
1. Installing Compatible Libraries If you are aware of which version of Java is required by the file that is displaying an error, you can simply install that version of Java on your device in order to make it compatible with the file. After that, the JNI error ought to be fixed by itself.
2. Make sure you have the most recent version of Java installed. All of the more recent versions of Java come with backward compatibility. This indicates that a certain version of Java is capable of supporting all files that are dependent on any earlier version of Java. Installing the most recent version of Java is all that is required to rectify the JNI problem; there is no need for further consideration in this regard.
3. Reset the Java Path: Your software or a Java file may on occasion check the incorrect Java installation path. In these cases, you will need to reset the Java path. In the event that this occurs, the most recent version of Java won’t be recognized, and as a result, Minecraft won’t load properly and displays the message “A JNI issue has occurred.” Therefore, the Java path in the memory of your machine can be reset to point toward the most recent Java installation if you so want.
4. Update JDK in the Terminal Some distributions of Linux do not enable users to get Java updates through the use of third-party files downloaded from the internet. After that, you will need to utilize the terminal that comes pre-installed on your computer to execute instructions that will install and update Java.
Download and install the most recent version of Java (Windows, Mac, and Linux)
You may have already realized that the second solution to solve JNI issues in Minecraft is the one that is both the easiest and one that is most reliable. You do not need to conduct any manual investigation; all you need to do to fix the error is update the version of Java that is installed on your system. This is the procedure to follow:
1. To begin, navigate to the official Oracle website and locate the most recent version of your system’s operating system in the area labeled “latest.” While we are installing Java on Windows, you can install it on Linux or macOS by following the exact same instructions.
2. After that, click on the download link for the Java installer file to begin the download process. It is possible that you will need to test the installer’s compatibility with a Linux-based operating system.
3. When the download is finished, open the setup file and proceed with the installation in accordance with the step-by-step instructions.
4. You have the ability to change the location of the folder in which the new version of Java is being installed.
However, we strongly advise against doing so because the default location is where the majority of games and programs search for Java.
5. Once the installation has been successfully completed, you can quit the installer by clicking the “Close” button. After that, you won’t get any JNI issues while attempting to run Java files or features, including the Java version of Minecraft.
How to Reset Java Path Will Fix the JNI Error in Minecraft on Windows Only
In the event that installing the most recent version does not resolve JNI issues in Minecraft, the path variable for Java in your environment may be out of date or wrong. In that instance, resetting the route variable in Java can be done by following these steps:
1. To begin, press the Win key and R simultaneously on your Windows 11 keyboard to bring up the run dialog box. In this box, write “sysdm.cpl” and then hit the Enter key on your keyboard. Your device’s system properties will open when you click this button.
2. In the window that displays system properties, navigate to the “Advanced” tab and then click the option labeled “Environment Variables.”
3. After that, navigate to the “System variables” area and pick the “Path” variable from the drop-down menu there. After that, select the “Edit” button from the menu.
4. As a last step, select all of the corrupted Java variable paths and click the “Delete” button to erase them.
Then, restart your computer. You can reinstall Java by following the steps in the preceding section, even if you are unsure which of the variables to delete.
If this is the case, you can delete all of the variables at once.
How to Install Java on Linux to Fix Minecraft Errors
Launch the terminal application and enter the commands listed below to do a manual installation of Jave on your Linux operating system:
sudo apt-get update
sudo apt install openjdk-18-jdk
It is important to keep in mind that you should only use one command at a time in order for them to operate correctly. However, make sure that the number “18” is replaced with the most recent version of Java that is available right now. You can locate it by conducting a speedy search.
How to Uninstall Old Versions of Java on Your PC to Fix Minecraft Errors
If you have the most recent version of Java installed on your system, you will not encounter any JNI problems when running Minecraft or any other software, and these errors are unaffected by any earlier versions of Java that may have been installed on your computer. You can, however, choose to uninstall them in order to free up some storage space and ensure that Minecraft always uses the most recent installation available. Here are the steps:
1. To begin, press the Windows key on your keyboard and type “Control Panel” into the search bar. From the list of search results, you can access the Control Panel by clicking.
2. Next, navigate to the “Programs” area of the menu and select the “Uninstall software” option.
3. This tab provides access to all of the versions of Java that are installed on your computer. You can a single click on them to view their version numbers, and a double click will uninstall the program.
A solution to the “JNI Error Has Occurred” in Minecraft
JNI errors are far less common nowadays as a result of improvements made in subsequent game versions. However, if you do find yourself in a situation where you encounter a JNI issue in Minecraft, you now have the ability to fix it.
Additionally, it is certain to be of assistance to you while you are attempting to create your own Minecraft Java server. In addition to that, you can use the strategy to limit the number of mistakes you experience while using the best Minecraft mods.
Having said that, if you are still seeing JNI issues or other difficulties of a similar nature in Minecraft, feel free to get in touch with us. You are welcome to post any questions or concerns in the comments section, where a member of our staff will respond and assist you.